
Ever had a crepe so tender and fragrant it felt like a little edible cloud hugging your taste buds? That’s the magic of vanilla crepes. They’re not just pancakes with a fancy name.
They’re a dance of texture and flavor, thin as a whisper yet bursting with subtle sweetness and vanilla’s warm embrace. Making them right?
Now that’s a skill, a love letter to patience and precision. The vanilla crepe is a staple from France’s Brittany region but has gone way beyond borders, captivating foodies worldwide. Whether served as a humble breakfast or an elegant dessert, these crepes carry a charm that’s hard to beat.
What makes vanilla crepes special isn’t just the flavor but the technique. The batter needs a silky consistency, no lumps allowed. And the pan?
A crepe pan or nonstick skillet is best to get those golden edges without tearing. The vanilla used—whether from a bean or pure extract—adds a fragrant depth that simple sugar can’t touch.
This article isn’t just a recipe; it’s a masterclass in crafting flawless vanilla crepes, with tips that’ll elevate your kitchen game whether you’re a home cook or a seasoned pro.
Ingredients & Substitutions

Let’s start by talking about the essentials—ingredients. Here’s the classic lineup:
- 1 cup all-purpose flour (sifted)
- 2 large eggs
- 1 1/4 cups whole milk (room temp)
- 2 tbsp unsalted butter (melted and cooled)
- 2 tbsp granulated sugar
- 1 tsp pure vanilla extract or 1 vanilla bean (scraped)
- Pinch of salt
Simple, right? But oh, the choices behind these simple things are where the magic happens.
Flour matters. All-purpose flour is your go-to for tender crepes that hold together without getting tough. Using cake flour makes them ultra-delicate but riskier to flip; bread flour adds chewiness, but you’ll lose that classic melt-in-the-mouth feel. For gluten-free? Use a blend of rice and tapioca flour, but beware—some brands absorb more liquid, so adjust milk accordingly.
Eggs are the binder, but if you’re dairy-free or vegan, swap with a flaxseed “egg” (1 tbsp flax + 3 tbsp water, rest 10 mins). It won’t be quite as elastic, but it holds surprisingly well.
Milk brings richness. Whole milk is classic, but almond, oat, or soy milk can sub in with a little extra vanilla for depth. Coconut milk adds creaminess and a subtle tropical note—perfect for a twist.
Butter isn’t just fat; it’s flavor and a non-stick agent. Use clarified butter or ghee for a nuttier, less smoky taste at high heat. For a vegan option, coconut oil works wonders, but it can lend a slight aroma that’s not always desirable.
Vanilla extract versus vanilla bean? The bean delivers intense aroma and tiny black specks—signs of real vanilla that make crepes look artisanal. Extract is convenient and consistent but lacks that visual wow.
Step-by-Step Instructions
Now, here’s where most folks get a little nervous. Crepes seem simple, but getting that perfect thinness and tender chew takes practice.
- Mix the Dry Ingredients: In a bowl, sift together the flour, sugar, and salt. Sifting is key to avoiding lumps—don’t skip it or you’ll curse those stubborn bits in your batter later.
- Whisk Wet Ingredients: In another bowl, beat the eggs with the milk, melted butter, and vanilla. If using a vanilla bean, scrape the seeds into the wet mix. Let it sit for 5 mins to let the vanilla infuse.
- Combine: Slowly pour the wet into the dry while whisking vigorously. The goal is a smooth, slightly runny batter—like heavy cream. If too thick, add a splash more milk. Too thin? A bit more flour. Avoid overmixing to keep the gluten from toughening the crepes.
- Rest the Batter: Cover and chill for at least 30 mins, preferably an hour. This resting allows the starch to hydrate and gluten to relax, giving tender, elastic crepes. Skip this? Your crepes may tear or bubble unevenly.
- Heat the Pan: Use a crepe pan or a nonstick skillet over medium heat. Brush a small amount of butter or oil and wipe away excess with paper towel. Too much fat means greasy crepes.
- Cook Each Crepe: Pour about 1/4 cup of batter in the center. Quickly swirl the pan to spread batter thin and even, like a painter’s stroke. Cook until edges lift and the bottom is golden brown, about 1-2 mins. Flip carefully with a thin spatula. Cook the other side 30 seconds. Patience here = perfection.
- Stack and Serve: Keep crepes warm in a low oven (around 200°F). Separate each with parchment if stacking, so they don’t stick.
Common pitfalls? Overcooking turns crepes rubbery. Batter too thick = thick, pancake-like crepes, no thanks. Too thin = tears easily. And skipping rest? That’s amateur hour—your crepes won’t have that silky smooth texture.
Want a twist? Add a tablespoon of Grand Marnier or rum to the batter for an adult note. Or try lemon zest for a fresh zing. For a savory option, skip the sugar and vanilla, and add herbs and grated cheese.
Cooking Techniques & Science

Why swirl? It’s about surface tension and the quick setting of batter. When poured, the batter naturally wants to pool. Spreading it fast creates that thin, even layer that cooks evenly.
Heat control is everything. Medium heat allows the proteins and starches to set gently, forming a flexible sheet. High heat cooks too fast, burns edges, and leaves raw spots inside.
Butter is not just for flavor. It creates a barrier, reducing sticking by preventing batter from bonding directly with the pan’s metal surface.
Scientifically, crepes rely on gluten formation (from flour and eggs) for elasticity. The resting period lets gluten strands relax, making crepes tender rather than tough. The sugar caramelizes on contact with heat, contributing to those lacy golden edges with crispy texture contrast.
Tools matter too. A dedicated crepe pan has low sides for easy flipping and an even, non-stick surface. A silicone spatula with a thin edge is the pro’s choice for flipping without tearing.
Serving & Pairing Suggestions
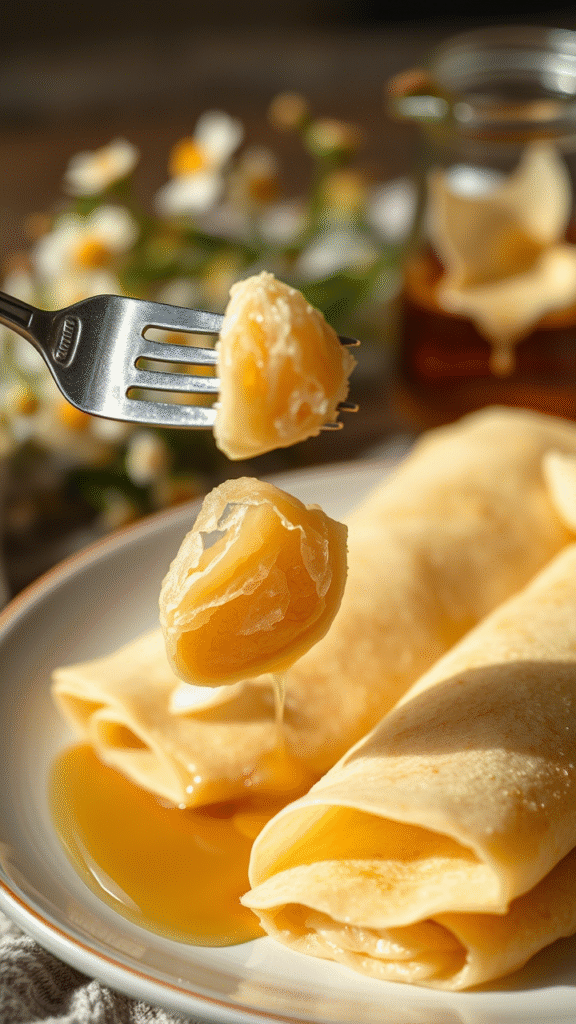
Presentation is about simplicity and elegance. Fold crepes into quarters or roll with fillings peeking out. Dust with powdered sugar or drizzle with melted chocolate or honey. A dollop of whipped cream or a scoop of vanilla bean ice cream takes it next level.
Classic fillings? Lemon juice and sugar, Nutella and banana slices, or fresh berries with mascarpone cheese. For savory, think smoked salmon, crème fraîche, and dill.
Pair vanilla crepes with a light sparkling wine or a cup of strong espresso. For a cozy brunch, a fresh fruit salad with mint brightens the plate.
Conclusion
Vanilla crepes are deceptively simple but require finesse. From choosing the right flour and vanilla to mastering the swirling technique, every step shapes the final product’s delicate texture and aromatic beauty. Rest your batter, mind your heat, and treat your pan gently—those are the secrets to crepe perfection.
Experiment with additions, but keep the core technique sacred. This recipe isn’t just about making crepes; it’s about honoring a culinary tradition that’s tender, elegant, and endlessly versatile. Now go whip up those crepes and watch them disappear bite by buttery bite.
Frequently Asked Questions
Q1: Can I make vanilla crepe batter ahead of time?
Absolutely. You can prepare it up to 24 hours in advance. Just cover it tightly and stir gently before cooking. Resting overnight can even enhance the flavor and texture.
Q2: What’s the best pan for crepes?
A nonstick crepe pan with low sides works best. Cast iron can be used but needs thorough seasoning and careful buttering to prevent sticking.
Q3: How do I fix lumpy batter?
Use a fine mesh sieve to strain lumps before resting. Whisking vigorously and sifting dry ingredients helps prevent lumps too.
Q4: Can I freeze cooked crepes?
Yes, place parchment sheets between crepes to prevent sticking, wrap tightly, and freeze up to a month. Thaw in the fridge before reheating gently.
Q5: What if my crepes stick to the pan?
Ensure your pan is hot but not smoking, lightly buttered and wiped off excess fat. Using too much butter or oil causes sticking and greasy crepes.

Food lover, recipe creator & the heart behind NoshCrafters.com. Olivia shares mouthwatering, easy-to-make dishes that turn everyday meals into unforgettable bites. When she’s not experimenting in the kitchen, she’s busy plating up inspiration for home cooks everywhere.