
So, here’s the thing. I didn’t set out to make this Red Velvet Oreo Cheesecake a showstopper. I just wanted to use up some leftover Oreos and a block of cream cheese from a cancelled brunch. But what happened in my kitchen that day—somewhere between a crumb crust and a slow, low bake—well, it turned out to be the kind of dessert that shuts people up at the dinner table. Just silence. And then a soft, almost reverent, “what is this?”
This isn’t your average red velvet anything. And it sure as sugar ain’t just cheesecake with food coloring. What we’re talking about is a layered, velvet-rich, Oreo-crusted, tangy-sweet masterpiece that balances earthiness, creaminess, and crunch. There’s a reason red velvet’s stuck around since the Great Depression—it’s the flavor of luxury in disguise. And when you slam that nostalgic charm into the unapologetic indulgence of Oreos and cheesecake? You get something dangerously good.
Let’s break this thing down, real chef-to-chef.
What Makes This Cheesecake Special?
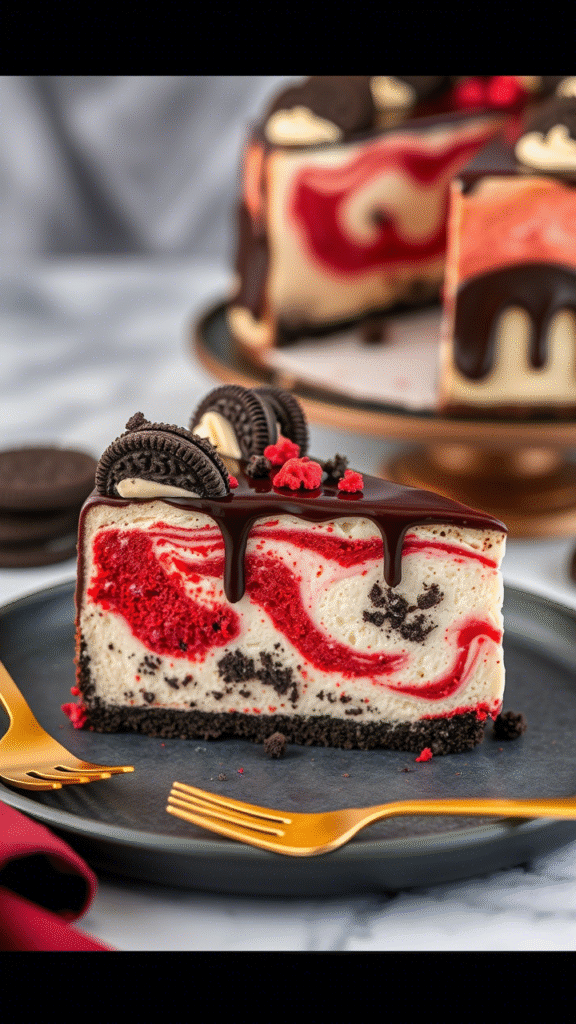
First off, red velvet isn’t just chocolate cake dyed red. True red velvet has that subtle tang—thanks to buttermilk and vinegar—and a pillowy cocoa warmth that plays nice with creamy textures. Now, imagine building that soft, scarlet body into the heart of a baked cheesecake. No fluff. No shortcuts. Just deep flavor and solid technique.
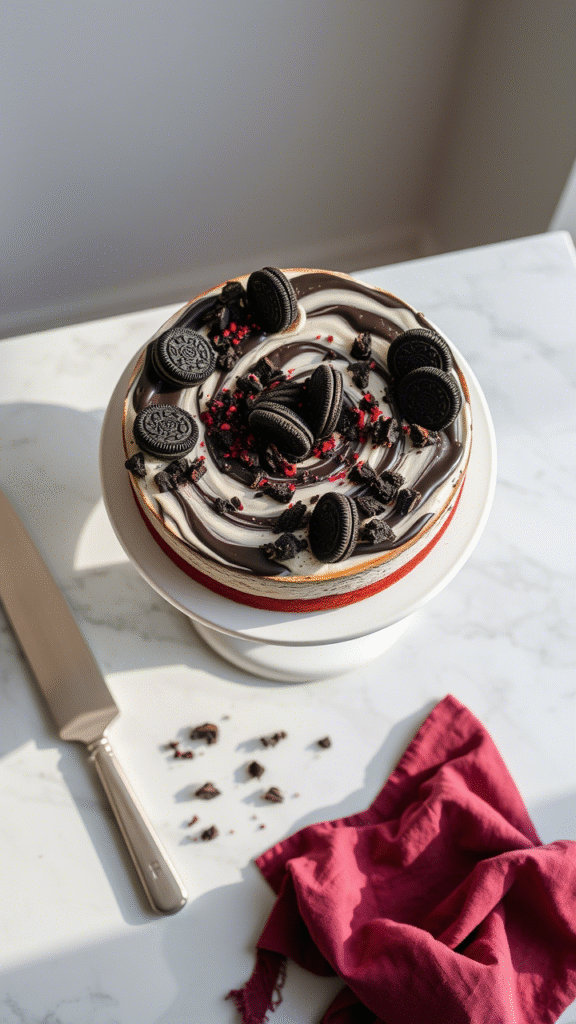
Then there’s the Oreo crust—more than just a base. It adds crunch, contrast, and a pitch-black color that makes the red pop like a 1940s lipstick. Visually dramatic. Texturally smart. Flavor-wise? Cookies and cream meets southern charm.
Ingredients & Substitutions
Crust
- 24 Oreo cookies (with filling)
- 5 tbsp unsalted butter, melted
(Sub: coconut oil for dairy-free; vegan butter works too)
Cheesecake Filling
- 3 x 8 oz (680g) blocks full-fat cream cheese, room temp
(Skip low-fat. Just don’t. Texture goes wonky.) - 1 cup granulated sugar
- 1 tbsp unsweetened cocoa powder
(Dutch process or natural—it does affect flavor. Dutch gives deeper color.) - 3 large eggs, room temp
- 1 tsp vanilla extract
- ½ cup sour cream
(Or full-fat Greek yogurt for a tangier bite.) - 1 tbsp white vinegar
- ½ cup buttermilk
(DIY: ½ cup milk + 1½ tsp lemon juice. Let sit 10 mins.) - 2 tbsp red food coloring gel
(Gel = bolder color, less liquid. Avoid watery dyes.)
Topping (Optional but recommended)
- 1 cup heavy whipping cream
- 3 tbsp powdered sugar
- ½ tsp vanilla
- Crushed Oreos to garnish
(Use golden Oreos if you want contrast. Trust me, it looks insane.)
Step-by-Step Instructions
1. Make the crust.
Blitz the Oreos in a food processor till fine crumbs. Not just crushed—obliterated. Add melted butter, pulse till it looks like damp black sand. Press into the bottom of a springform pan lined with parchment. You can go up the sides a bit, but I prefer just the base for cleaner slices. Bake at 325°F (160°C) for 10 mins, then cool.
Pro tip: Always bake your crust. Skipping this makes it soggy. The butter needs a moment to set structure.
2. Prepare the filling.
Beat cream cheese till smooth. Like, glassy-smooth. No lumps. Add sugar and beat again. Then the cocoa powder. Now the eggs—one at a time. Scrape the bowl. No shortcuts here.
Mix in vanilla, sour cream, buttermilk, vinegar, then food coloring. You should have a crimson, velvety batter that smells like tangy dreams.
Common mistake: Overmixing once eggs are in. That whips in air, leads to cracks. Go gentle.
3. Bake low and slow.
Pour over cooled crust. Tap the pan gently to release air bubbles (or poke with a toothpick). Place pan in a larger roasting pan. Pour hot water halfway up the sides—hello, water bath. Bake at 300°F (150°C) for 60–70 mins. The edges should be set, but the center still has a jiggle.
Crack insurance: Don’t skip the water bath. Keeps the bake even and moist.
Turn off oven, crack door, and cool for 1 hour inside. Then chill in fridge at least 4 hours, preferably overnight. Patience here makes all the difference.
4. Make the topping.
Whip cold cream, sugar, and vanilla to soft peaks. Pipe or spread on top of the chilled cake. Crushed Oreos go on top like the crown jewels.
Cooking Techniques & Science
Why a water bath? It cushions the cheesecake from abrupt temperature swings. Dry heat = cracks. Steam = silk. You wouldn’t broil crème brûlée, right? Same logic.
Why room-temp dairy? Cold cream cheese clumps. You’ll never get it smooth if it’s too firm, and once you beat it too hard, you’ve passed the cheesecake point of no return. You’ll end up with a grainy mess.
Why red velvet in cheesecake? It’s a flavor base that already balances cocoa and acid—perfect partners for cream cheese. You’re not just coloring a cheesecake red. You’re building flavor.
Tools that help:
- Springform pan (essential for easy release)
- Food processor (for crust)
- Electric mixer or stand mixer (saves your arms)
- Roasting pan (for the water bath)
- Fine mesh sieve (if your cocoa’s lumpy)
Serving & Pairing Suggestions
Slice with a hot knife. Seriously—dip in hot water, wipe dry, slice. Repeat every time. Clean cuts, no drag.
Serve with espresso or black coffee to cut through the richness. Want to pair with wine? Go sweet: a chilled glass of ruby port or a sparkling moscato.
Plating tip: Use a black or slate-gray plate for max contrast. A little swoosh of whipped cream and a shard of Oreo for drama. Even throw in a dried rose petal if you’re feeling extra.
What Makes It Truly Special?
It’s that balance. Between crunch and cream. Between rich and tart. Between nostalgic and bold.
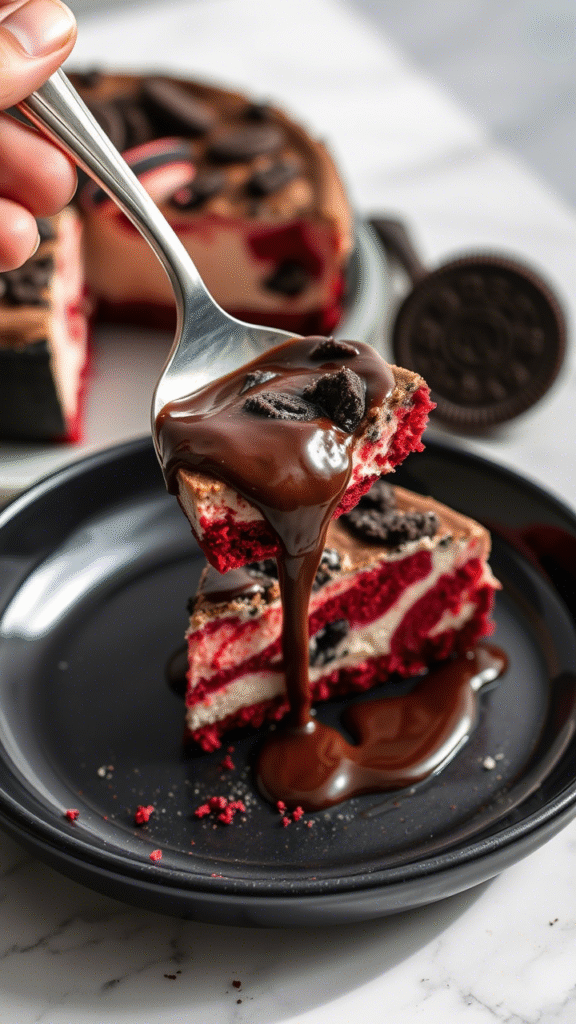
Most cheesecakes sit heavy. This one? It melts. The buttermilk and vinegar lighten the mouthfeel. The Oreos punch in flavor without overpowering. And that red velvet thread that runs through it—well, it makes people pause mid-bite.
If you’ve ever served dessert and watched someone close their eyes while chewing? Yeah. That’s what this cheesecake does.
FAQs
1. Can I make this without red food coloring?
Yes, but the visual drama will be gone. You can try natural beet powder, but it won’t give the same pop.
2. Can I freeze Red Velvet Oreo Cheesecake?
Absolutely. Wrap tightly in plastic and foil. Freeze slices up to 2 months. Thaw in fridge overnight.
3. Why did my cheesecake crack?
Too much air in the batter, no water bath, or drastic temperature changes. Cool gradually and avoid overbeating.
4. Can I use low-fat cream cheese?
Technically, yes. But the texture will suffer. Full-fat is key for that creamy, rich mouthfeel.
5. Can I make this gluten-free?
Yes—use gluten-free chocolate sandwich cookies for the crust. The rest of the recipe is naturally gluten-free.
Final Thoughts from the Line
Here’s the deal. Anyone can toss together a cheesecake. But building this one—the red velvet Oreo kind—takes intention. Technique. Restraint where it matters and indulgence where it counts.
It’s not just a dessert. It’s a memory waiting to happen. Something people will ask for again, then again, then again.

Food lover, recipe creator & the heart behind NoshCrafters.com. Olivia shares mouthwatering, easy-to-make dishes that turn everyday meals into unforgettable bites. When she’s not experimenting in the kitchen, she’s busy plating up inspiration for home cooks everywhere.