
Ever bit into a slice of Hawaiian pineapple cake and felt like you were transported to a sunny beach somewhere, with waves crashing and a soft breeze carrying the scent of ripe fruit? That’s the magic of this iconic dessert. It’s not just a cake—it’s an edible postcard from the islands, wrapped in buttery richness and bursting with the tangy sweetness of pineapple. For many pro bakers and chefs, nailing the perfect Hawaiian pineapple cake is a rite of passage, because it’s deceptively simple yet demands precision and a deep understanding of ingredients and technique.
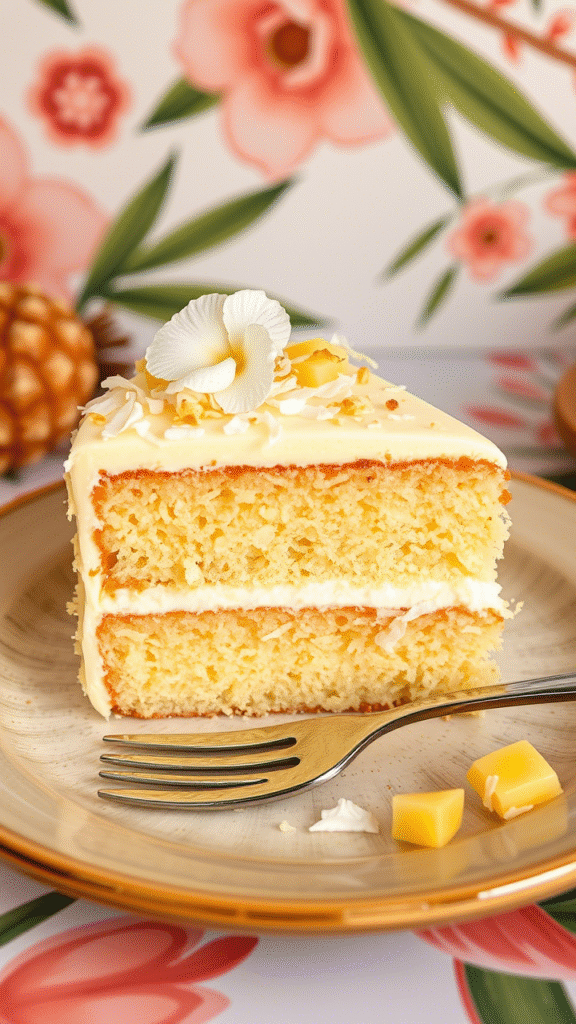
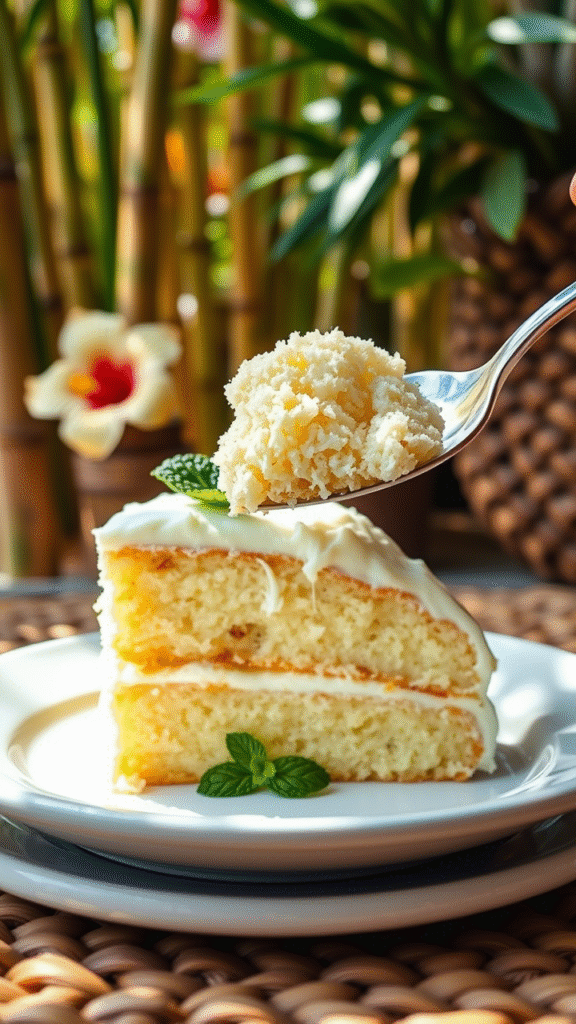
What makes Hawaiian pineapple cake special is its unique combination of a tender, moist cake base and a luscious pineapple filling, often baked into a compact, almost cookie-like square. The balance between buttery sweetness and tropical tartness has a way of hooking the palate instantly. Beyond flavor, this cake carries cultural significance. It represents Hawaii’s agricultural heritage and love for fresh local produce, especially pineapple, which once stood as a cornerstone crop for the islands’ economy. It’s a nostalgic symbol, a dessert you find in local bakeries, gift shops, and family gatherings alike.
Let’s dive into what you’ll need, the right techniques, and how to make a Hawaiian pineapple cake that’ll wow both casual eaters and dessert aficionados.
Ingredients & Substitutions
First things first, the ingredients. Here’s what you typically need:
- All-purpose flour (or cake flour for a lighter texture)
- Unsalted butter, softened
- Granulated sugar
- Eggs
- Baking powder
- Salt
- Vanilla extract
- Pineapple filling or crushed pineapple (fresh, canned, or homemade jam)
- Powdered sugar for dusting (optional)
Ingredient insights & swaps
Using all-purpose flour is common because it strikes a good balance of protein for structure without being too dense. However, cake flour can be swapped in for a softer crumb—if you want a lighter mouthfeel. But beware, cake flour absorbs less liquid, so you might need to adjust wet ingredients slightly.
For the butter, unsalted is key so you control the saltiness. Always choose high-fat, European-style butter if possible; the extra richness elevates the cake’s flavor profoundly. If you’re dealing with dairy allergies, coconut oil is a decent substitute, but it will change the texture and impart a subtle coconut flavor—still quite fitting for a Hawaiian-inspired treat.
Eggs act as binders and leaveners here. For vegan versions, flaxseed meal or chia seeds mixed with water can replace eggs, but expect a denser crumb.
The star ingredient is obviously the pineapple. Fresh crushed pineapple offers the brightest flavor but can add too much moisture if not drained well. Canned pineapple preserves or jams are more consistent and easier to work with. For a more intense pineapple essence, a homemade pineapple jam, cooked down to a thick consistency, is a pro’s choice.
Sugar controls sweetness and contributes to the cake’s tender crumb. Some bakers like to mix in a touch of brown sugar or honey for deeper flavor complexity.
Step-by-Step Instructions
Let’s talk through the process like you’re in a pro kitchen.
- Prep your pineapple filling first. If you’re using fresh, crush and drain it well. If making jam, cook it down slowly to thicken—this concentrates flavor and prevents sogginess.
- Cream the butter and sugar. Use a stand mixer or hand mixer on medium speed. This step is crucial: cream for at least 3-5 minutes until pale and fluffy. This incorporates air, making the cake tender.
- Add eggs one at a time. Beat well after each addition. This prevents the batter from curdling. Add vanilla extract now to infuse aroma.
- Sift dry ingredients together (flour, baking powder, salt). Slowly fold them into the wet mixture. Overmixing develops gluten and toughens the cake, so fold gently but thoroughly.
- Assemble the cake. Spread half the batter into a lined or greased baking pan. Evenly layer the pineapple filling over the batter—don’t overdo it or it’ll leak out during baking. Cover with the remaining batter.
- Bake at 350°F (175°C) for about 30-40 minutes. Keep a close eye on it starting at 25 minutes—cake edges should turn golden brown, and a toothpick inserted should come out mostly clean with a few moist crumbs.
- Cool completely before slicing. This step is often overlooked but super important—hot pineapple cake can crumble or stick. Chilling also helps the filling set nicely.
Pro tips & common pitfalls
- Avoid too much pineapple liquid; it ruins the cake texture.
- Don’t skip creaming the butter well.
- Use parchment paper for easy removal.
- Test your oven temperature; a hot spot can burn edges.
Variations to consider
For a twist, add macadamia nuts to the batter or sprinkle coconut flakes on top before baking. For a spicier note, toss in a pinch of ground ginger or cinnamon.
Cooking Techniques & Science
Why cream butter and sugar? This is classic. The creaming incorporates microscopic air bubbles into the fat, which help leaven the cake during baking. If you skip or rush this, your cake will be dense and flat.
Folding in flour gently prevents gluten from overdeveloping. Gluten strands give bread chewiness but can make cakes tough. We want tender, not rubbery.
The pineapple filling’s moisture content is critical. Pineapple is mostly water, so too much liquid means a soggy cake. That’s why cooks drain it or reduce it into jam. The sugar in jam acts as a preservative and thickener, concentrating flavor and stabilizing texture.
Baking the cake at 350°F ensures it cooks through without burning too fast. Lower temperatures result in lighter crumb; too high and the edges burn while the middle stays raw.
Important tools include a stand mixer for creaming, fine mesh sieve for sifting dry ingredients, and an oven thermometer to verify your heat. A springform pan is sometimes used to help with delicate removal.
Serving & Pairing Suggestions
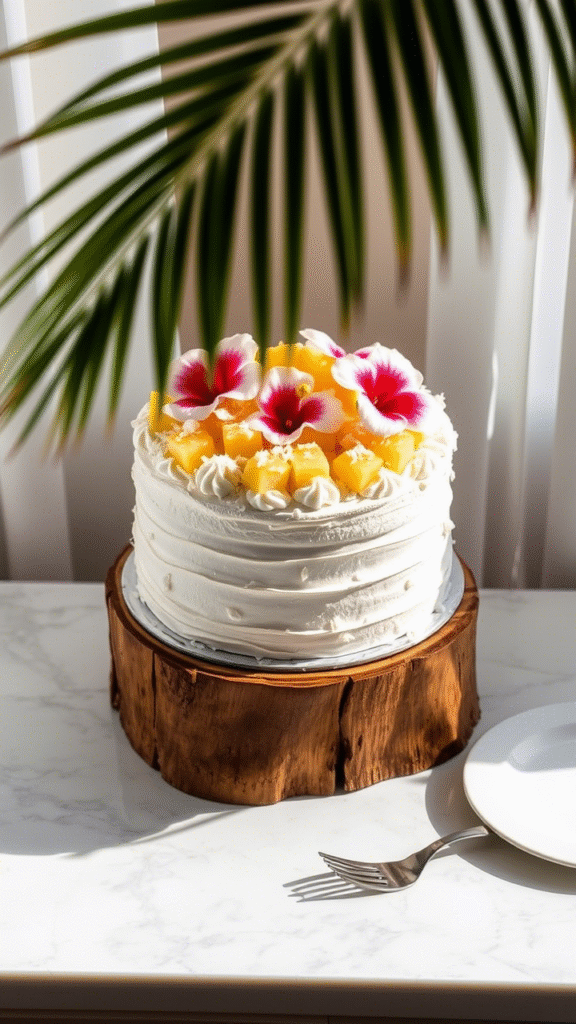
Presentation counts. Hawaiian pineapple cake is often cut into neat, small squares, perfect for gift boxes or party platters. Dust with powdered sugar or drizzle with a light glaze made from pineapple juice and powdered sugar for a shiny finish.
Pair it with a cup of strong Kona coffee or a tropical cocktail like a Mai Tai. The cake’s richness pairs well with bright, acidic beverages.
For a fuller dessert experience, serve alongside whipped coconut cream or a scoop of vanilla bean ice cream.
Conclusion
Hawaiian pineapple cake is more than just a dessert—it’s a celebration of island life and flavors. Getting the balance right between tender cake and tangy pineapple filling is key. Using fresh or homemade pineapple jam, creaming butter well, and baking at the correct temperature will elevate your results. Don’t forget to chill before slicing—it makes a huge difference!
Feel free to experiment with nuts, spices, or coconut to add your own flair. With a bit of practice, this cake can become your signature tropical treat.
Frequently Asked Questions
Can I use frozen pineapple for the filling?
Yes, but thaw and drain very well to avoid excess moisture.
How do I store Hawaiian pineapple cake?
Keep it airtight in the fridge for up to 5 days. It also freezes well wrapped tightly.
Can I make this cake gluten-free?
Yes, use a gluten-free flour blend. Adjust liquid as GF flours absorb differently.
What’s the difference between using fresh vs canned pineapple?
Fresh offers brighter, fresher flavor but more moisture. Canned is sweeter, consistent, and easier to manage.
How do I prevent the cake from being soggy?
Drain pineapple thoroughly or use reduced jam, and avoid overfilling.

Food lover, recipe creator & the heart behind NoshCrafters.com. Olivia shares mouthwatering, easy-to-make dishes that turn everyday meals into unforgettable bites. When she’s not experimenting in the kitchen, she’s busy plating up inspiration for home cooks everywhere.