
There’s something magical about the combination of chocolate and peanut butter. It’s a pairing that has transcended the realm of simple snacks to become a beloved fixture in desserts, candy bars, and baked goods. But when you combine these two flavors with the creamy, tangy goodness of cheesecake? That’s when you know you’ve reached dessert nirvana.
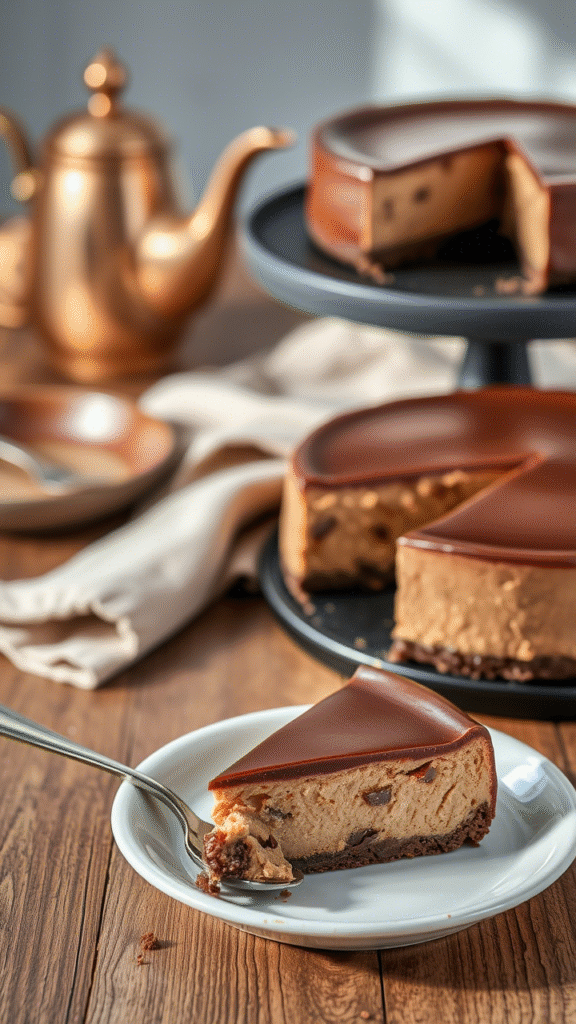
A well-made chocolate peanut butter cheesecake isn’t just a treat; it’s a dessert experience. The rich, velvety texture of the cheesecake complements the smooth, salted peanut butter filling, all topped off with a glossy, decadent chocolate layer. Each bite offers a perfect balance between sweetness and saltiness, with an added depth that comes from the contrast of textures.
In this article, I’ll walk you through the making of this indulgent dessert, offering tips and insights that will not only elevate your cheesecake but also deepen your understanding of the techniques behind it. From ingredient selection to step-by-step instructions, we’ll dive into the science of cheesecake, uncovering why it works and how to perfect it every time.
Ingredients & Substitutions

Before you start, let’s talk ingredients. A cheesecake, like any good dish, relies heavily on its components, so choosing the best ones can make or break your dessert. Let’s break down what you’ll need.
- For the crust:
- 1 1/2 cups of graham cracker crumbs
- 1/4 cup of sugar
- 1/2 cup unsalted butter, melted
- Pinch of salt
- For the cheesecake filling:
- 3 (8 oz) packages of cream cheese, softened
- 1 cup of peanut butter (creamy or crunchy, but creamy works best for smoothness)
- 1 cup of powdered sugar
- 1 teaspoon of vanilla extract
- 2 large eggs, at room temperature
- 1/2 cup of sour cream (adds richness)
- For the chocolate topping:
- 6 oz of semi-sweet or dark chocolate (the better the chocolate, the better the topping)
- 1/2 cup of heavy cream
- 1 tablespoon of butter
Now, I know that some people might need substitutions based on dietary needs, allergies, or what’s available at their local store. If you’re avoiding gluten, swap the graham crackers for gluten-free cookies or even rice cereal crushed finely. For a healthier twist, you could opt for reduced-fat cream cheese, though that will slightly affect the texture. Dairy-free? Use a plant-based cream cheese and a non-dairy butter substitute.
As for peanut butter, there’s no need to overthink it—go with the good stuff! I’m talking the kind with peanuts and salt—avoid the overly processed varieties with lots of additives. The quality of your ingredients here truly matters.
Step-by-Step Instructions
Alright, let’s get to the good part—making this masterpiece.
Step 1: Preparing the Crust
In a medium bowl, combine graham cracker crumbs, sugar, and salt. Add melted butter and stir until everything’s well-coated. The mixture should be moist but not soggy. If it sticks together when pressed, that’s your cue. Press this mixture into the bottom of a springform pan, making sure it’s evenly spread. Don’t be shy about packing it down; you want a firm base. Pop this into the fridge while you prep the filling. Letting it chill for at least 15 minutes helps it set better during baking.
Step 2: Making the Cheesecake Filling
Now, let’s focus on that luscious peanut butter cheesecake filling. Beat the softened cream cheese until smooth—this is crucial, as any lumps will show up in your final product. Add the peanut butter, powdered sugar, and vanilla, and continue to beat until fully incorporated. You don’t want any clumps of peanut butter! Once smooth, add the eggs one at a time, mixing gently after each addition. This ensures the cheesecake filling stays light and airy without over-beating, which can cause cracking during baking. Finally, fold in the sour cream, which adds richness and helps balance the sweetness.
Step 3: Baking the Cheesecake
Pour the cheesecake filling into your chilled crust. Smooth out the top with a spatula. Now, here’s where patience comes in: bake the cheesecake at 325°F (163°C) for about 50-60 minutes. The center should still be slightly jiggly when you tap the pan (think of it like a gentle wobble). Resist the urge to overbake! It’s easy to think that it needs to be fully firm, but overbaking leads to a dry, crumbly texture.
Once it’s done, turn off the oven, crack the oven door slightly, and let the cheesecake cool for about an hour. This cooling method reduces the chance of it cracking due to sudden temperature changes.
Step 4: Preparing the Chocolate Topping
While your cheesecake cools, make the chocolate topping. Chop the chocolate finely (so it melts evenly) and place it in a bowl. Heat the heavy cream in a saucepan over medium heat until it just begins to simmer, then pour it over the chocolate. Let it sit for about 3 minutes, and then stir until it’s smooth and glossy. Add the butter for extra silkiness. Let the chocolate topping cool slightly before pouring it over the cooled cheesecake. Spread it out evenly with a spatula, and refrigerate the cheesecake for at least 4 hours or overnight.
Cooking Techniques & Science
Cheesecake is as much about technique as it is about ingredients. Understanding the science behind each step can elevate your skills as a baker. The reason we bake cheesecake in a water bath or low and slow is to prevent it from cracking. The slow baking at a relatively low temperature helps the cake cook evenly, giving it that luxurious, smooth texture.
Another tip? Avoid opening the oven door too often while baking. Sudden temperature shifts can affect the cheesecake’s structure, leading to cracks. That’s why I always recommend letting it cool slowly in the oven.
Now, let’s talk about texture. You want the cheesecake to be dense but creamy. Over-beating the cream cheese or over-baking the filling results in a dry, crumbly cake. It’s a fine line to walk, but with a gentle hand, you’ll get that dreamy, velvety smooth texture that makes this dessert so special.
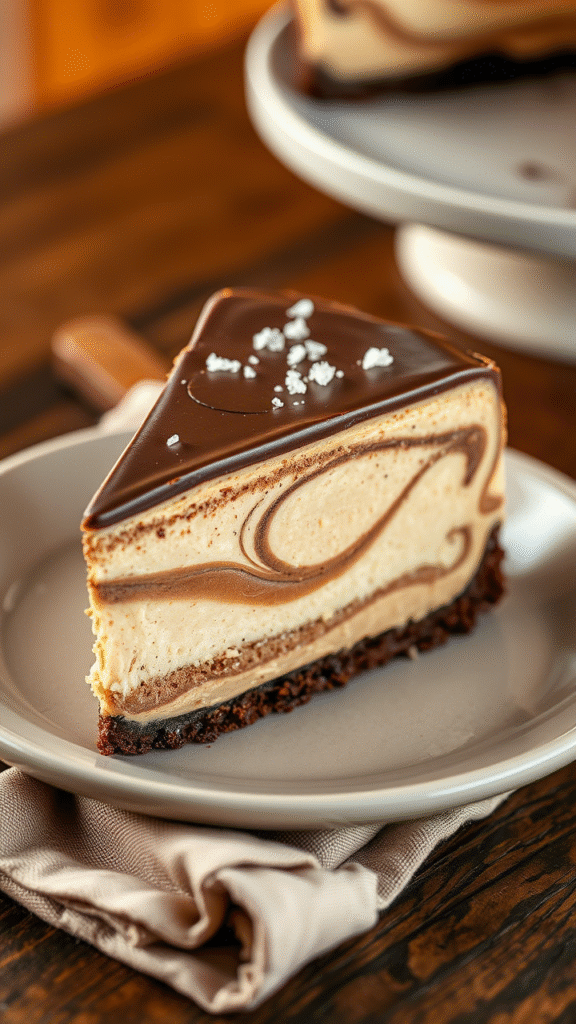
The chocolate topping is important for both flavor and aesthetics. Using high-quality chocolate and letting it cool before pouring it over the cheesecake ensures a glossy, professional-looking finish. Don’t rush it; this topping is the crown jewel of your dessert.
Serving & Pairing Suggestions
When it comes to serving, less is more. The cheesecake itself is rich and indulgent, so keep the garnishes simple. A few chopped peanuts or a drizzle of caramel sauce will do wonders without overwhelming the flavors.
Pair it with a glass of full-bodied red wine or a rich coffee—something with enough depth to stand up to the dessert’s sweetness. If you’re feeling fancy, a scoop of vanilla bean ice cream on the side is a crowd-pleaser.
Conclusion
The chocolate peanut butter cheesecake is a showstopper. It’s rich, decadent, and incredibly satisfying. The balance between the salty-sweet peanut butter and the smooth chocolate topping is nothing short of divine. With a little patience and attention to detail, you’ll create a dessert that’s sure to impress at any gathering.
Remember, the key to perfecting this dessert lies in using high-quality ingredients and taking the time to understand the techniques behind cheesecake-making. Once you’ve mastered it, this dessert will become your signature dish.
Frequently Asked Questions
Can I make this cheesecake ahead of time?
Yes! In fact, cheesecake is often better when made a day in advance. It gives the flavors time to meld, and the texture firms up beautifully in the fridge.
How can I prevent the cheesecake from cracking?
To avoid cracks, don’t overbeat the batter, bake at a low temperature, and let the cheesecake cool slowly in the oven. A water bath can also help create a smoother texture.
Can I use almond butter instead of peanut butter?
Absolutely! Almond butter can be a great alternative, but it’s a bit milder in flavor than peanut butter. Make sure to pick a smooth, unsweetened version for the best results.
What’s the best way to store leftovers?
Store your cheesecake in an airtight container in the refrigerator for up to 5 days. If you need to store it longer, you can freeze individual slices for up to 2 months. Just thaw in the fridge before serving.
Can I make this gluten-free?
Yes, by using gluten-free graham crackers or a different type of gluten-free base (like crushed gluten-free cookies or rice cereal), you can easily make this cheesecake gluten-free without compromising on taste.

Food lover, recipe creator & the heart behind NoshCrafters.com. Olivia shares mouthwatering, easy-to-make dishes that turn everyday meals into unforgettable bites. When she’s not experimenting in the kitchen, she’s busy plating up inspiration for home cooks everywhere.