
First time I made Black Velvet Cake, I genuinely thought I’d ruined it. The batter was darker than sin, the crumb dense but glossy—almost like chocolate mousse met devil’s food in a back alley. But when I took that first bite, I knew. This wasn’t just another chocolate cake trying to play dress-up. This was something else entirely.
The kind of cake that doesn’t whisper on your tongue. It smolders.
And yet, you don’t see it often. Black Velvet Cake is like Red Velvet’s brooding, misunderstood cousin who listens to vinyl and quotes Neruda. It has cocoa, but not too much. It’s smooth, moist, and slightly tangy, but richer. Way richer. And that black color? That’s not from food dye. That’s from the alchemy of ingredients and a little kitchen know-how.
Let’s get into it—because this is one of those recipes that, once you master it, you’ll guard like a secret family heirloom.
What is Black Velvet Cake?
At its core, Black Velvet Cake is a hybrid. Think Red Velvet Cake, but ditch the garish dye and crank up the depth with dark cocoa and black cocoa powder. We’re aiming for flavor that lands somewhere between a classic chocolate cake and something you’d eat in a smoky jazz bar. It’s velvety (duh), complex, and with a gentle tang from buttermilk and vinegar that balances out the richness.
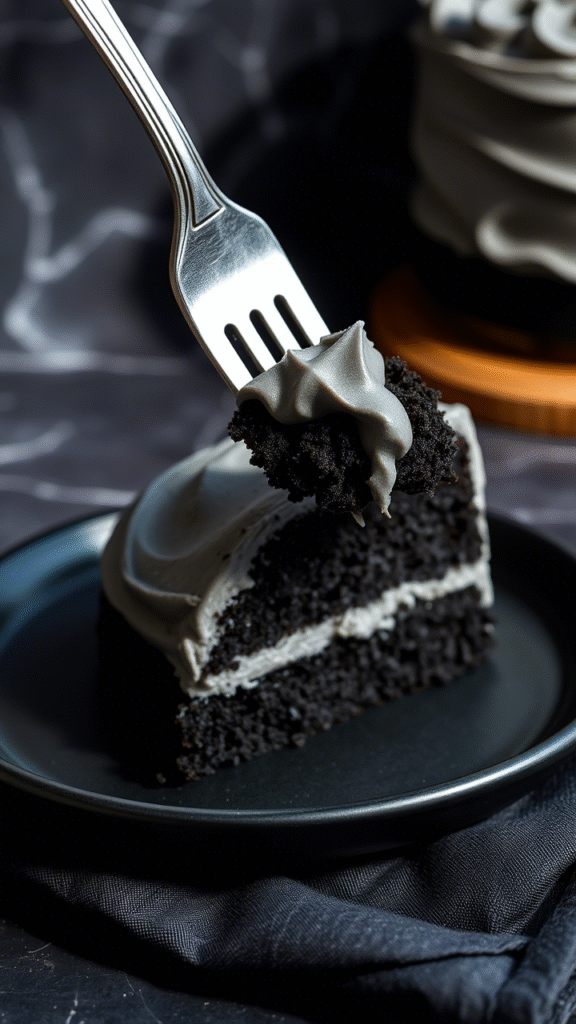
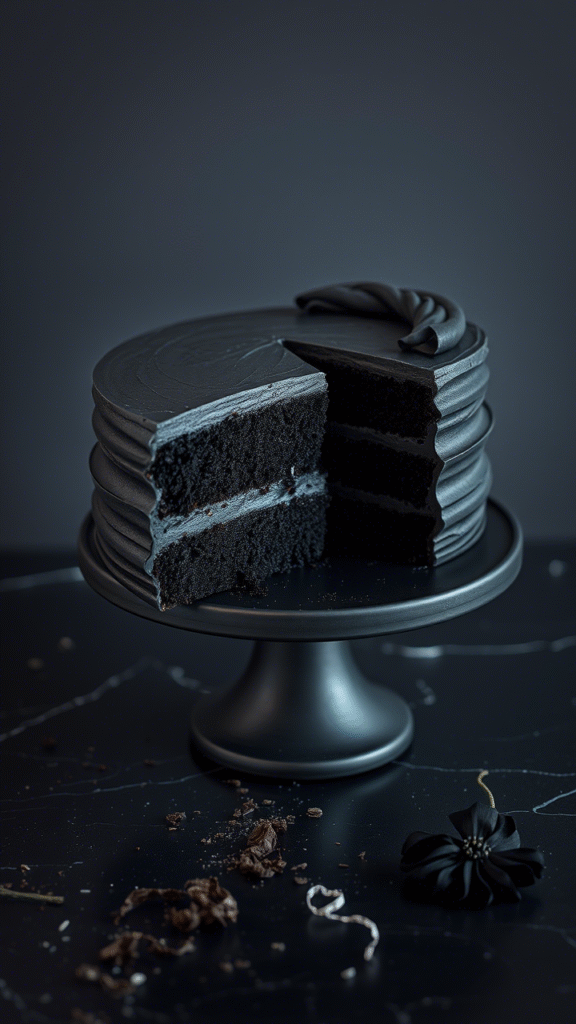
What makes it special? Well—besides the fact that it looks like obsidian on a plate—it’s the texture. Silky. Smooth crumb. Soft, but not floppy. This ain’t a cupcake for kids’ parties. It’s a grown-up cake. One with layers. Both literally and metaphorically.
Ingredients & Substitutions
Here’s the lineup, in the order you’ll use ‘em:
- 1¾ cups (220g) all-purpose flour
You want regular ol’ AP flour here. Cake flour makes it too light; bread flour is a brick waiting to happen. - ¾ cup (65g) Dutch-processed cocoa powder
Not natural cocoa. Dutch-processed is smoother, deeper. More mysterious. - ¼ cup (20g) black cocoa powder
Think Oreo cookie color. Adds that midnight black hue and rich bitterness. - 1½ tsp baking soda
Don’t use baking powder. This cake needs soda to react with the acidic ingredients. - ½ tsp salt
Use kosher if possible. Table salt can make things taste flat or too salty. - 1½ cups (300g) granulated sugar
Simple, straightforward. You could swap in coconut sugar for a more caramel note, but you’ll sacrifice some of the color. - ½ cup (120ml) neutral oil (canola or grapeseed)
Oil, not butter. You want moist, not crumbly. - 2 large eggs, room temp
Cold eggs mess with your emulsion. Leave ‘em out for 30 min. - 1 cup (240ml) buttermilk
Adds tang and softness. No buttermilk? Mix 1 tbsp vinegar into 1 cup whole milk. Wait 10 mins. - 1 tsp vanilla extract
Real, not imitation. You’ll taste the difference. - 1 tsp white vinegar or apple cider vinegar
Reacts with the baking soda for lift and that classic velvet texture. - ½ cup (120ml) hot brewed coffee or hot water
Coffee deepens the chocolate flavor. You won’t taste “coffee,” just richness. But hot water will do in a pinch.
Step-by-Step Instructions
1. Preheat and prep.
Set oven to 350°F (175°C). Grease and line two 8-inch cake pans. Or three if you’re feeling fancy. Parchment circles make all the difference.
2. Dry meets dry.
Sift together flour, both cocoas, baking soda, and salt. Yes, sift. Clumpy cocoa ruins lives.
3. Whisk the wet.
In another bowl, whisk sugar, oil, eggs, and vanilla until smooth. You want it glossy and unified.
4. Bring it together.
Add the buttermilk and vinegar. Don’t overmix—just until combined. Then slowly add your dry mix in batches.
5. Finish strong.
Pour in hot coffee. The batter will look almost too runny. That’s correct. It’s supposed to.
6. Bake.
Divide batter evenly between pans. Bake for 30–35 mins, or until a toothpick comes out with a few moist crumbs. Not clean. Never clean.
7. Cool completely.
This cake is delicate when warm. Let it sit in the pan 10 minutes, then turn out onto a wire rack.
Common Mistakes to Avoid
- Don’t overbake.
You’ll dry it out. It should feel springy in the center, not firm. - Don’t sub natural cocoa.
Throws off the chemistry and the color. - Don’t skip vinegar.
It’s what gives velvet cakes that texture. No vinegar? No velvet. - Don’t frost warm cake.
You’ll melt the frosting into a tragedy. Let it chill.
Cooking Techniques & The Science Behind It
So why the vinegar and soda? It’s a chemical reaction that aerates the batter—tiny bubbles form, lifting the cake into that tender, plush texture. Buttermilk boosts this by being acidic, too. That’s where the “velvet” part comes in.
The combination of Dutch and black cocoa is also key. Black cocoa is ultra-dutched—basically stripped of almost all acidity. It’s dark, smooth, and intense. Not sweet. You use it sparingly, though. Too much, and the cake dries out or turns bitter.
Oil instead of butter keeps things moist for days. Butter gives flavor, sure—but oil coats flour particles better, reducing gluten formation. That’s science speak for: tender, not chewy.
Hot liquid? That helps “bloom” the cocoa, unlocking deeper notes and a smoother texture.
Tools You’ll Need
- 8-inch cake pans
Preferably light-colored. Dark pans can overbake the edges. - Sifter
Cocoa clumps like nobody’s business. Don’t skip. - Whisk or stand mixer
You don’t need a mixer, but it makes life easier. Just don’t overbeat. - Offset spatula
Essential for even frosting. Trust me.
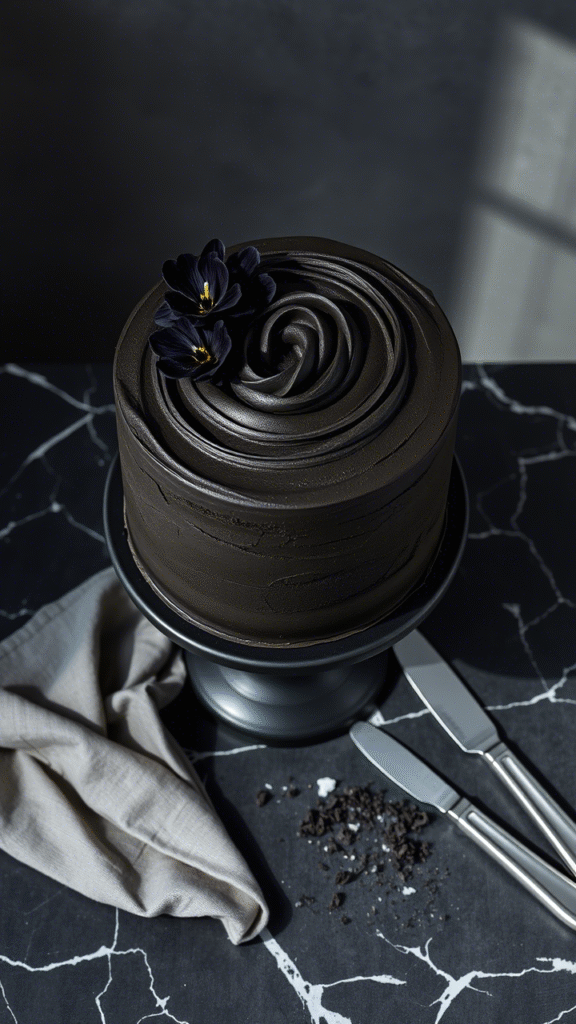
Frosting & Finishing Touches
Now let’s talk toppings. This cake begs for contrast. That means cream cheese frosting is the traditional move—but a whipped ganache or mascarpone whip? Unreal.
Simple Cream Cheese Frosting:
- 8 oz cream cheese, softened
- ½ cup unsalted butter
- 3 cups powdered sugar
- 1 tsp vanilla
- Pinch salt
Whip the butter and cheese first until light. Add sugar gradually. Don’t just dump it all in like a savage. Balance with vanilla and a tiny pinch of salt to cut the sweetness.
Want drama? Add a dash of black cocoa to the frosting for a marble effect.
Serving & Pairing Suggestions
Plate this on a white dish to let that deep black stand out. Garnish with edible gold leaf or a dusting of powdered sugar through a stencil. Elegant.
Pair with:
- Espresso or cold brew — Enhances the cocoa complexity.
- Blackberries or raspberries — A little tartness is perfect.
- A big ol’ glass of red wine — Something jammy like a Zinfandel.
Or just eat it with your hands at midnight. I won’t judge. Been there.
Conclusion
Black Velvet Cake isn’t your everyday bake. It’s a statement. It’s seductive, rich, and a little moody. It’s the cake you make when you want to feel something—beyond just a sugar rush.
The key lies in the balance. Acid vs. fat. Bitterness vs. sweet. Light crumb vs. dark color. It’s about understanding not just what to use—but why.
If you’ve never made a velvet-style cake without the red dye, this is your sign to start. There’s depth here. There’s intention. And once you make it once, you’ll come back again. And again. That’s the black magic of it.
FAQs
1. Can I make this cake gluten-free?
Yes! Use a 1:1 gluten-free flour blend with xanthan gum included. Let the batter sit for 15 mins before baking to hydrate the starches properly.
2. Can I use only black cocoa powder?
Technically yes, but it’s intense and drying. Best to blend it with Dutch-processed cocoa for balance.
3. Can I make cupcakes with this recipe?
Absolutely. Fill liners ⅔ full and bake at 350°F for about 18–20 mins. Watch ‘em closely—they bake fast.
4. How do I store this cake?
Wrap it tightly and refrigerate for up to 5 days. Bring to room temp before serving. Or freeze layers (unfrosted) for up to 2 months.
5. What if I don’t have buttermilk?
Mix 1 tbsp white vinegar or lemon juice into 1 cup of whole milk. Let it

Food lover, recipe creator & the heart behind NoshCrafters.com. Olivia shares mouthwatering, easy-to-make dishes that turn everyday meals into unforgettable bites. When she’s not experimenting in the kitchen, she’s busy plating up inspiration for home cooks everywhere.