
Banana pudding. It’s one of those desserts that takes you right back to childhood comforting, sweet, and creamy with layers of indulgence.
Growing up, it was the kind of treat you’d expect at family gatherings, church picnics, and Sunday dinners. But have you ever made banana pudding completely from scratch?
I’m talking about no instant pudding mix, no shortcuts just the real thing. It’s an art form, really. I still remember the first time I took a spoonful of homemade banana pudding.
It was like nothing I had tasted before. The flavor was richer, the texture silkier, and the bananas just tasted fresher. In this article, I’m going to walk you through how to make banana pudding from scratch step by step. And trust me, you’ll never want to go back to store-bought again.
Ingredients & Substitutions
Before we dive into the cooking process, let’s talk about the key ingredients you’ll need and some options if you’re dealing with dietary restrictions or regional ingredient differences. This recipe is classic and simple, but the quality of ingredients makes all the difference.
- Bananas: The star of the show. Use ripe but firm bananas for the best texture. Overripe ones might be too mushy and could alter the final texture of your pudding. If you’re feeling adventurous, you can use plantains for a different twist, though the flavor will be milder.
- Sugar: You’ll need granulated sugar for the custard and a bit more for layering. Some people substitute brown sugar for a deeper flavor, but I personally prefer the crisp sweetness of white sugar.
- Eggs: Large eggs are the base of your custard. You’ll be tempering them, so ensure they’re fresh—old eggs can curdle and ruin the pudding. If you need an egg-free version, you can substitute with cornstarch, though the texture won’t be quite as rich.
- Whole Milk: Full-fat milk works best. It helps create that creamy, silky texture that makes banana pudding so indulgent. You can use almond milk or oat milk, but it might alter the flavor slightly. If you’re avoiding dairy altogether, coconut milk is an interesting choice—it adds a unique flavor, but you might want to reduce the sugar a bit.
- Vanilla Extract: Use pure vanilla extract—trust me, it’s worth the extra cost. I’ve used imitation vanilla in the past and just never got the same depth of flavor.
- Butter: A little bit of butter enhances the flavor and makes the pudding silky smooth. If you’re looking for a dairy-free option, you could use margarine or coconut oil, though the taste will change.
- Cornstarch: This is the thickening agent. It’s crucial for achieving that perfect custard consistency. If you don’t have cornstarch, arrowroot can be a decent substitute, though it doesn’t set as firm.
- Vanilla Wafers: The foundation of any good banana pudding. These crunchy, slightly sweet cookies create the necessary texture contrast to the smooth custard. You can use any vanilla-flavored cookie, but these classic ones are what I consider essential. If you’re gluten-free, check for a gluten-free version of these cookies.
- Whipped Cream: A nice, fluffy topping is an essential finishing touch. I highly recommend making your own whipped cream, but if you’re short on time, store-bought works in a pinch.
Step-by-Step Instructions
Making banana pudding from scratch is surprisingly simple, though it does require a bit of patience. The most important part is making the custard—it’s easy to mess that part up if you’re not paying attention. But don’t worry, I’ve got your back.
Step 1: Prepare the Custard
Start by whisking together your eggs, sugar, and cornstarch in a bowl. This mixture is the base of your custard.
In a medium saucepan, heat your whole milk over medium heat until it starts to steam. Don’t let it boil—this is a gentle process. Once it’s steaming, slowly pour the hot milk into your egg mixture while constantly whisking. This step is called “tempering.” If you pour too fast or stop whisking, you’ll end up with scrambled eggs, and that’s a disaster.
Now pour that tempered egg mixture back into the saucepan. Keep whisking as it heats up again, and you’ll notice the custard thickening. It should coat the back of a spoon. Once it’s thick enough, remove it from the heat. Stir in the butter and vanilla extract. Set it aside to cool.
Step 2: Layer the Pudding
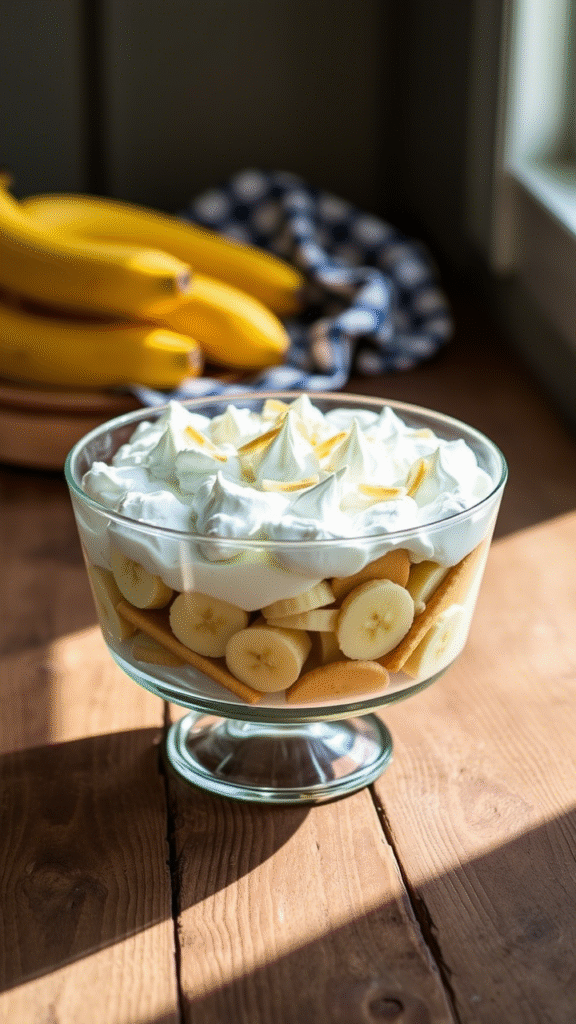
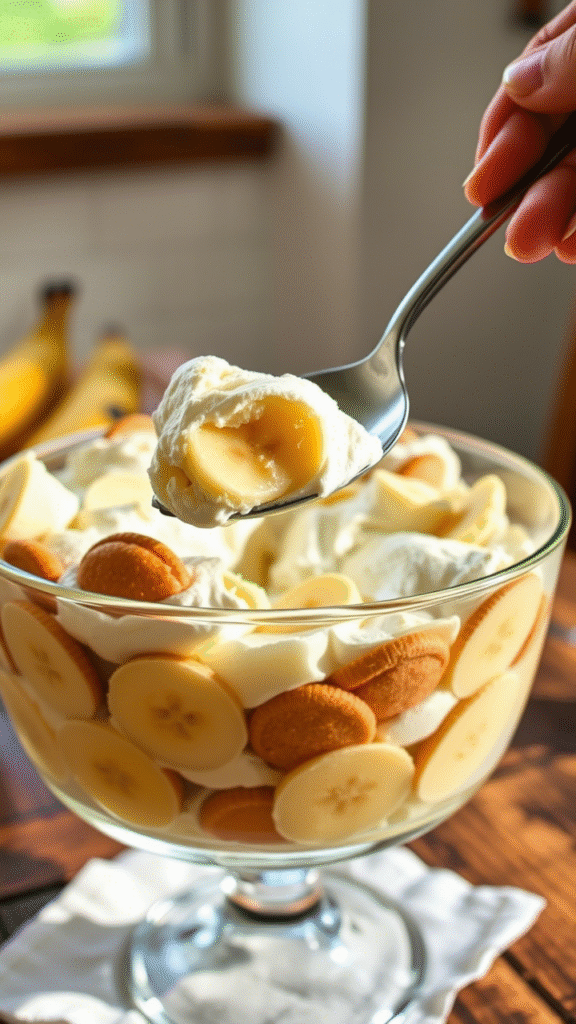
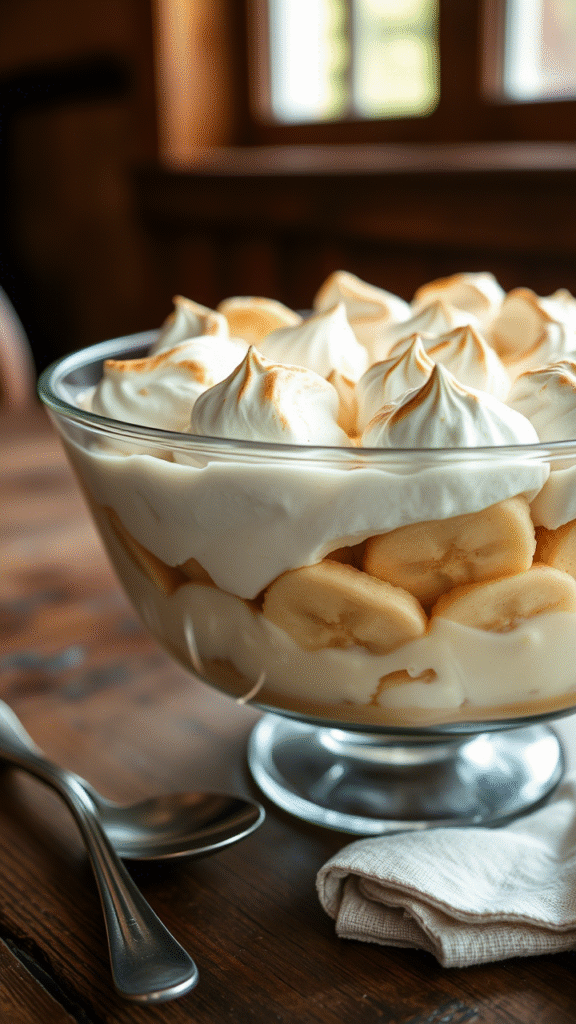
While the custard cools, slice your bananas. I recommend slicing them just thick enough to hold their shape—about 1/4-inch slices. Lay down a layer of vanilla wafers in the bottom of your serving dish (I love using a glass trifle dish for that classic look).
Once the custard is slightly cooled, pour a third of it over the wafers. Then, add a layer of bananas, followed by another layer of vanilla wafers. Repeat this process until you’ve used all the custard, bananas, and wafers.
Step 3: Chill & Serve
Cover the dish with plastic wrap, ensuring the wrap touches the surface of the pudding to prevent a skin from forming. Chill for at least four hours, but overnight is even better. Just before serving, top with freshly whipped cream. For an extra touch, garnish with a few more vanilla wafers on top.
read This Blog: https://noshcrafters.com/texas-roadhouse-rattlesnake-bites/
Cooking Techniques & Science
Banana pudding may seem like a simple dessert, but the methods behind the custard are crucial for achieving that perfect texture. The key to a smooth custard is to temper the eggs. Tempering is vital because it allows the eggs to slowly heat up without curdling. This process keeps the custard silky smooth, which is why you should never rush it.
Using whole milk instead of lower-fat milk or a milk substitute is essential for the rich, creamy texture. When you cook the custard, the milk proteins combine with the starch to form a thickened mixture. If you were to use water or a thin milk substitute, your custard wouldn’t have the same luxurious mouthfeel.
Cornstarch is also essential. It thickens the custard, allowing it to set properly when chilled. If you try to thicken the custard without it, you might end up with something that’s too runny.
Serving & Pairing Suggestions
Banana pudding is a showstopper all on its own, but if you’re feeling a little more creative, consider pairing it with something complementary. A fresh fruit salad, maybe with strawberries or berries, would balance the sweetness of the pudding. If you’re serving it as part of a larger meal, it pairs wonderfully with barbecued meats or fried chicken—something with a little savory heft to balance the richness.
If you’re hosting a more sophisticated gathering, you could elevate the dish by topping it with toasted coconut or crushed pecans. The crunchy textures bring a bit of contrast to the creamy layers. And don’t forget a splash of dark rum or bourbon in the whipped cream for a grown-up twist.
Conclusion
Banana pudding from scratch is one of those timeless desserts that’s worth the effort. There’s something about the layers of banana, vanilla wafer, and custard that just works on every level. It’s a sweet and satisfying treat that makes a meal feel like a celebration. When you make it from scratch, you unlock flavors that store-bought versions just can’t compete with.
My best advice? Don’t rush the process. Take your time with the custard, and don’t skip the chilling step. The end result will be so worth it.
Frequently Asked Questions
Can I use almond milk in banana pudding?
Yes, you can, though it may slightly alter the texture and flavor. Whole milk is best for a rich, creamy custard.
What can I substitute for vanilla wafers?
You could use any plain cookie, but graham crackers or shortbread would work as substitutes.How long can
store banana pudding?
Banana pudding lasts about 2-3 days in the fridge. However, the bananas may start to brown, so it’s best eaten within 24 hours for optimal freshness.
Can I make banana pudding ahead of time?
Absolutely! In fact, banana pudding tastes even better after it has chilled overnight.
How do I keep the bananas from turning brown?
You can toss the banana slices in a bit of lemon juice before layering them to slow down the browning process.

Food lover, recipe creator & the heart behind NoshCrafters.com. Olivia shares mouthwatering, easy-to-make dishes that turn everyday meals into unforgettable bites. When she’s not experimenting in the kitchen, she’s busy plating up inspiration for home cooks everywhere.