
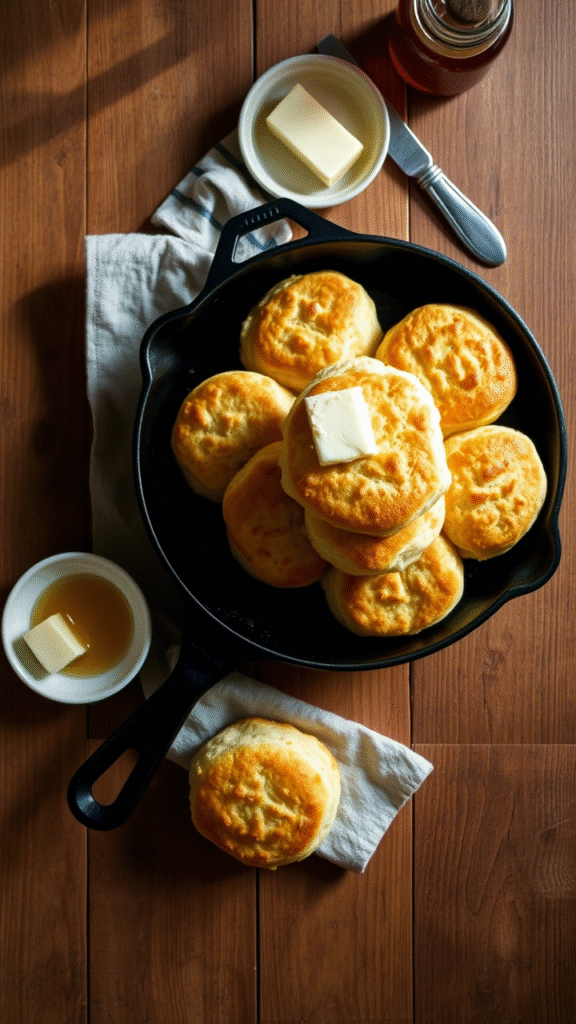
Ever tried a biscuit that practically melts in your mouth, but you didn’t have to knead the dough for hours? Sounds like a dream, right? Well, the secret’s in the soda. That’s right, 7-Up biscuits. These flaky, soft wonders are made with just a handful of ingredients, and, you guessed it, the star ingredient is none other than 7-Up. What started as a simple recipe to lighten the texture of biscuits without all that labor-intensive work has grown into a staple in many kitchens. From family dinners to brunch spreads, 7-Up biscuits are a shortcut to light, buttery perfection. Let’s dive into how to make them and what makes them so special.
Why 7-Up Biscuits Are So Special
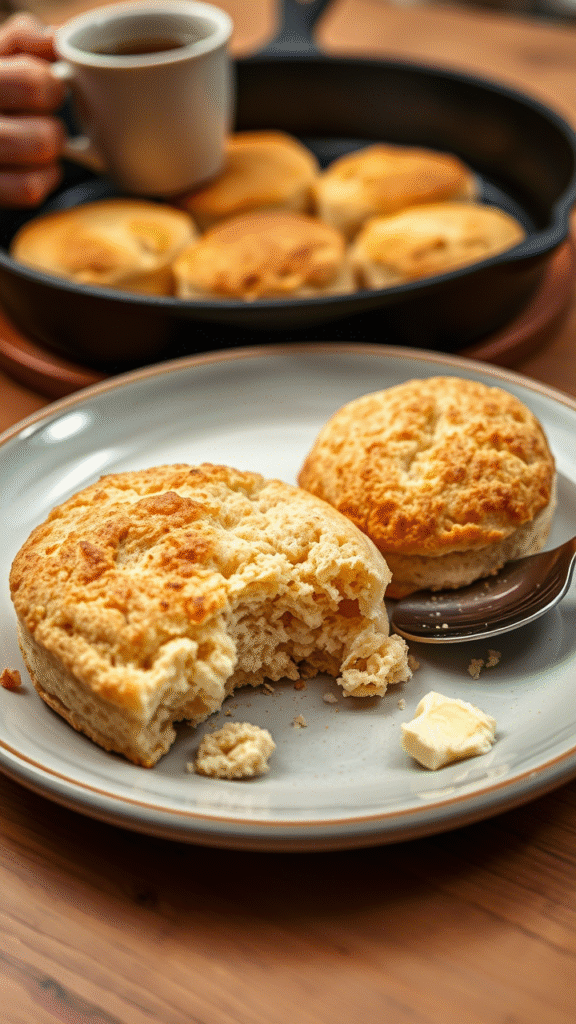
The magic of 7-Up biscuits lies in the combination of baking soda and the effervescence of 7-Up. The carbonation lifts the dough, creating an airy, fluffy biscuit. And don’t forget the butter, which imparts that rich, savory flavor. Unlike traditional biscuits that require hours of careful technique, 7-Up biscuits come together quickly and are practically foolproof. It’s a perfect shortcut for anyone looking for a flaky, melt-in-your-mouth result without the fuss.
Ingredients & Substitutions
Let’s talk about the core ingredients first. The beauty of this recipe is how few you need.
The Essentials:
- Self-Rising Flour (2 cups): This is key for that lift you want. If you don’t have self-rising flour, just use all-purpose flour and add 1 teaspoon of baking powder for every cup of flour.
- Butter (½ cup, cold): You need cold butter here. Cold butter makes for flakier biscuits, so don’t let it soften. Cut it into small cubes before mixing into the dry ingredients.
- 7-Up (½ cup): The secret to the fluffiness. You can substitute this with any lemon-lime soda, like Sprite, but don’t go with diet soda—it doesn’t give you that bubbly lift.
- Salt (½ teaspoon): A small pinch of salt balances the flavors and enhances the richness of the butter.
Substitutions:
- Gluten-Free Flour: Swap self-rising flour with a gluten-free blend, but make sure it contains a leavening agent, or add a little extra baking powder.
- Non-Dairy Milk: For a dairy-free option, swap the butter for a dairy-free margarine or coconut oil and use a plant-based milk.
- Herbs or Cheese: Want to spice things up? Add a teaspoon of dried rosemary or thyme, or sprinkle in some grated cheddar for an extra punch of flavor.
Now, if you’re looking for that crispy, buttery top (who isn’t?), consider brushing the biscuits with melted butter just before baking. It’ll give them that golden, irresistible shine.
Read This Blog: https://noshcrafters.com/jerk-wings-recipe/
Step-by-Step Instructions
1. Preheat & Prepare
Start by preheating your oven to 450°F (232°C). Make sure it’s fully preheated before you pop the biscuits in for that perfect rise. Also, grease your baking sheet lightly with cooking spray or line it with parchment paper.
2. Mix the Dry Ingredients
In a large bowl, whisk together the self-rising flour and salt. Simple enough, right? But don’t rush this step. Mixing the dry ingredients evenly is crucial to a uniform biscuit texture.
3. Add the Butter
Now, here’s where things get a little fun. Cut the cold butter into small cubes and add it to the flour. Use a pastry cutter, fork, or your fingers (a little messy but effective) to work the butter into the flour. You want it to resemble coarse crumbs—small, pea-sized bits of butter. This is what gives the biscuit its flakiness.
4. Add the 7-Up
Pour in the 7-Up (or lemon-lime soda) and stir gently. Don’t overmix! The dough should be a bit shaggy and sticky. Overmixing will deflate that beautiful airiness you’re after.
5. Shape the Biscuits
Turn the dough out onto a lightly floured surface. Pat it into a rectangle or square shape, about 1-inch thick. Now, fold the dough over itself a few times (think of it like folding a letter). This folding process creates those flaky layers. Pat it down again and use a biscuit cutter or a glass to cut out your rounds. Don’t twist the cutter when pressing down—just a straight press to keep those layers intact.
6. Bake!
Place the biscuits onto your prepared baking sheet. If you want them touching each other (which helps them rise taller), arrange them close together. If you like a bit more space, spread them out. Bake in the preheated oven for 10-12 minutes or until golden brown on top. The smell? You’ll know when they’re done—your kitchen will smell like warm, buttery perfection.
Cooking Techniques & Science
Here’s a little science behind the magic. The key to a perfect 7-Up biscuit is understanding how baking soda and the carbonation in the soda interact. The fizz in the 7-Up releases bubbles into the dough, which expands in the heat of the oven, creating those tender pockets of air.
Another important technique is keeping the butter cold. When the cold butter hits the hot oven, it melts slowly, releasing steam, which creates pockets in the dough. These pockets are essential for a flaky texture. If the butter’s too warm or too soft when you mix it in, you’ll lose that flaky layer effect, and your biscuits will be more dense.
Finally, be careful not to overwork the dough. The more you handle it, the more you develop the gluten, which can make the biscuits chewy instead of tender. A light touch is all you need.
Serving & Pairing Suggestions
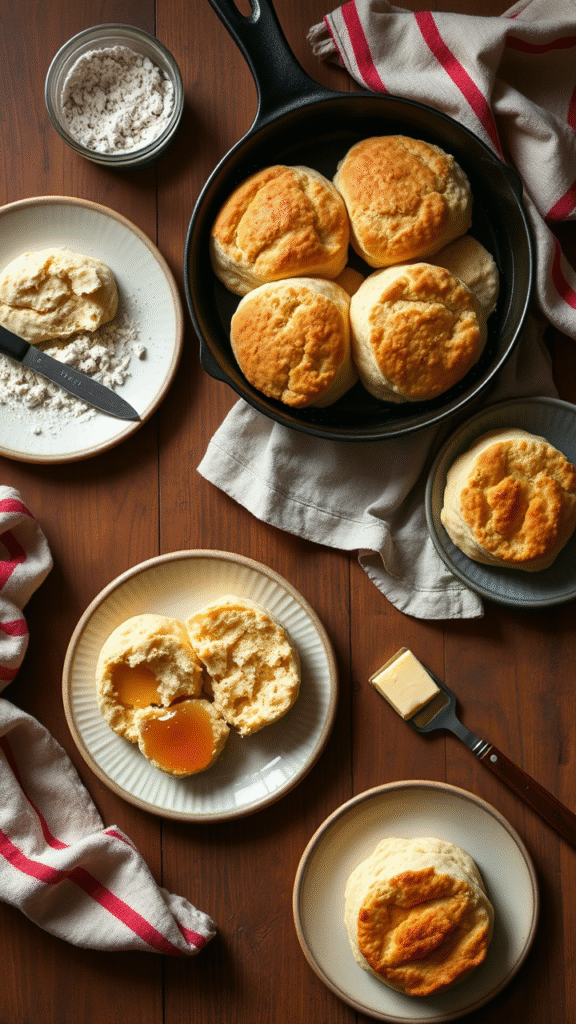
7-Up biscuits shine on their own, but they can be even better with the right accompaniments. Serve them warm with a pat of butter or a drizzle of honey. They pair perfectly with soups, stews, or hearty dishes like fried chicken. If you’re looking for something a bit more indulgent, serve them with gravy—whether it’s classic sausage gravy or a rich, creamy mushroom sauce.
For breakfast, slather a 7-Up biscuit with jam or marmalade and enjoy with a hot cup of coffee or tea. The light, zesty biscuits also complement a fresh fruit salad or bacon and eggs. Really, anything goes—these biscuits elevate almost any dish.
Conclusion
In the world of biscuits, the 7-Up biscuit stands out because of its simplicity and elegance. You don’t need to be a pro to pull it off, but the result will make you feel like one. From the right ingredients to the gentle folding technique, each step plays a role in creating that perfect, melt-in-your-mouth texture. Whether you’re baking for a holiday, a family dinner, or just to satisfy a craving, these biscuits deliver every time.
My best tip? Don’t overthink it. Sometimes, the simplest recipes are the best ones. You don’t need fancy tools or complex techniques—just great ingredients and a bit of patience.
Frequently Asked Questions
Can I make these biscuits ahead of time?
Yes, you can. They’re best served fresh, but you can prepare the dough, cut the biscuits, and freeze them before baking. When ready to bake, just pop them into a preheated oven—no thawing needed.
Can I use a different soda?
While 7-Up is the traditional choice for its balance of sweetness and fizz, any lemon-lime soda will work. Avoid diet sodas, as they don’t have the necessary carbonation.
What should I do if my dough is too sticky?
If the dough’s too sticky to handle, just sprinkle a little extra flour on it. However, be careful not to add too much flour—this can make your biscuits tough.
Why did my biscuits come out dense?
The most common cause is overmixing the dough. Be gentle with your mixing, and if the dough feels too stiff, add a little more soda to loosen it up.
How can I store leftover biscuits?
Store leftover biscuits in an airtight container at room temperature for up to 2 days. If you want them to last longer, freeze them and reheat them in the oven.

Food lover, recipe creator & the heart behind NoshCrafters.com. Olivia shares mouthwatering, easy-to-make dishes that turn everyday meals into unforgettable bites. When she’s not experimenting in the kitchen, she’s busy plating up inspiration for home cooks everywhere.